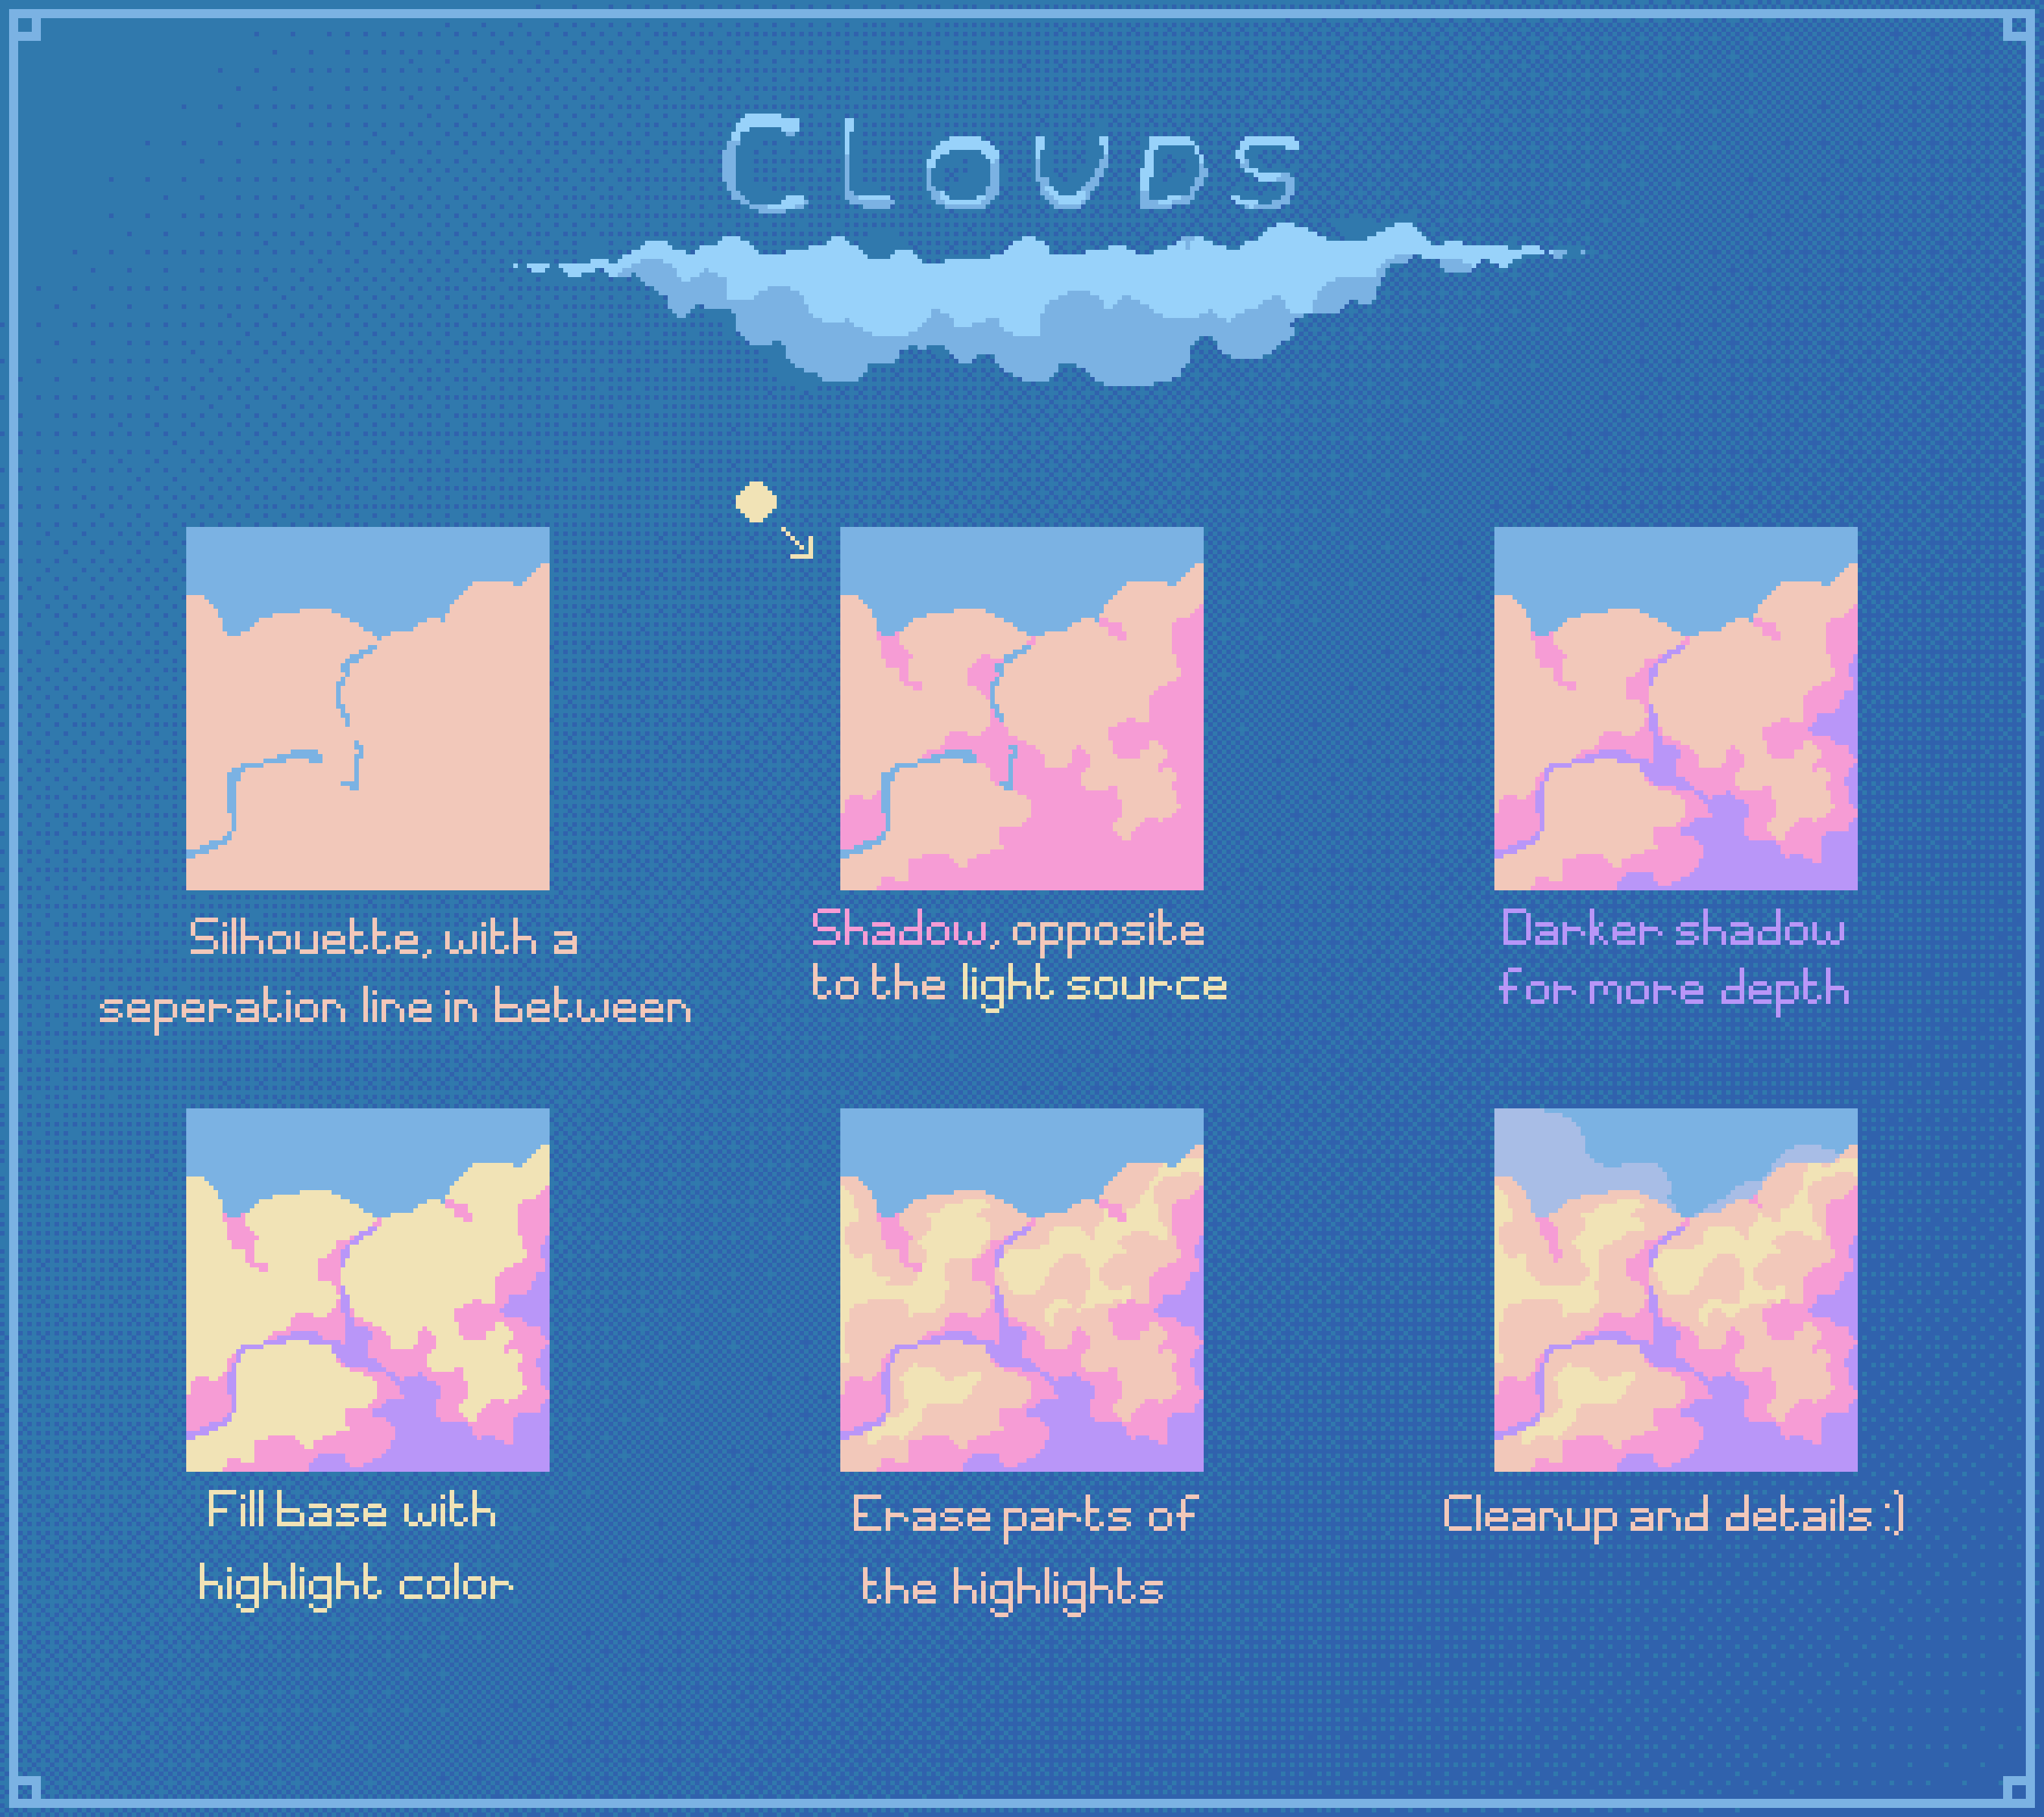
Clouds
When drawing clouds, I like to think of the clouds as being alive. Some parts of the clouds reach out into the sky, other parts just stay inside. It helps me get creative and make the clouds look as dynamic as possible. That might not work for you, however. You’ll find your own way to draw clouds as you keep practicing, but this tutorial will cover some the basic ideas and techniques.
Step 1: Background
Picking the background color is the best starting point when drawing clouds. You can always change it later, but it gives a good idea of what colors to choose next.
For this example I will be drawing clouds in daytime. So, a bright blue color works best.
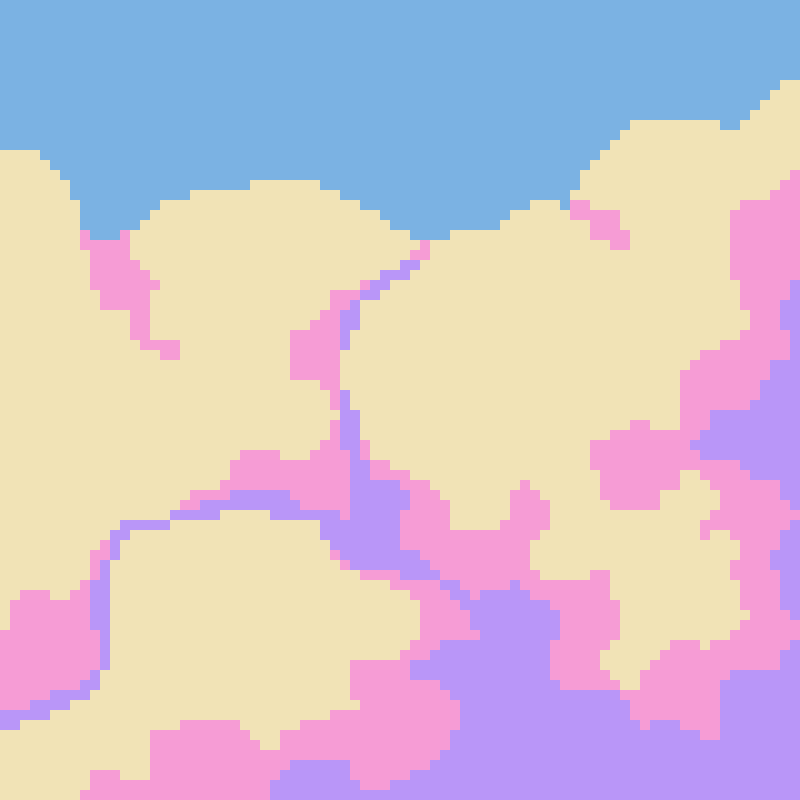
Step 2: Silhouette
The next step is to block out the general shape of the clouds. All the details will be added later, and the silhouette is going to be changed too. But, this step is a starting point so that everything comes together later when we add the details.
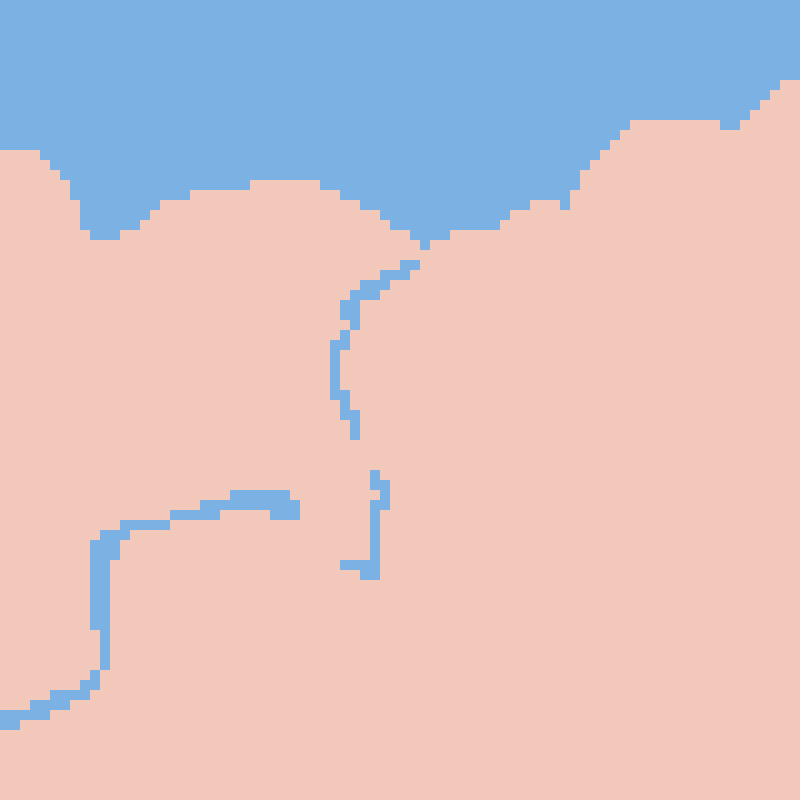
As you can see, I “cut into” the clouds a little bit, and separated them. This is contradicting the whole idea of a silhouette, but I feel it gives the drawing a bit of variety since there are two clouds instead of one.
Step 3: Shadows!
Step 3 is my favorite step, adding shadows. The trick when shading clouds is to think of them as big fluffy 3D shapes.
I’m drawing the shadows first here because the shadows are what define the light source, and add depth to the clouds.
Here is the first shadow color.
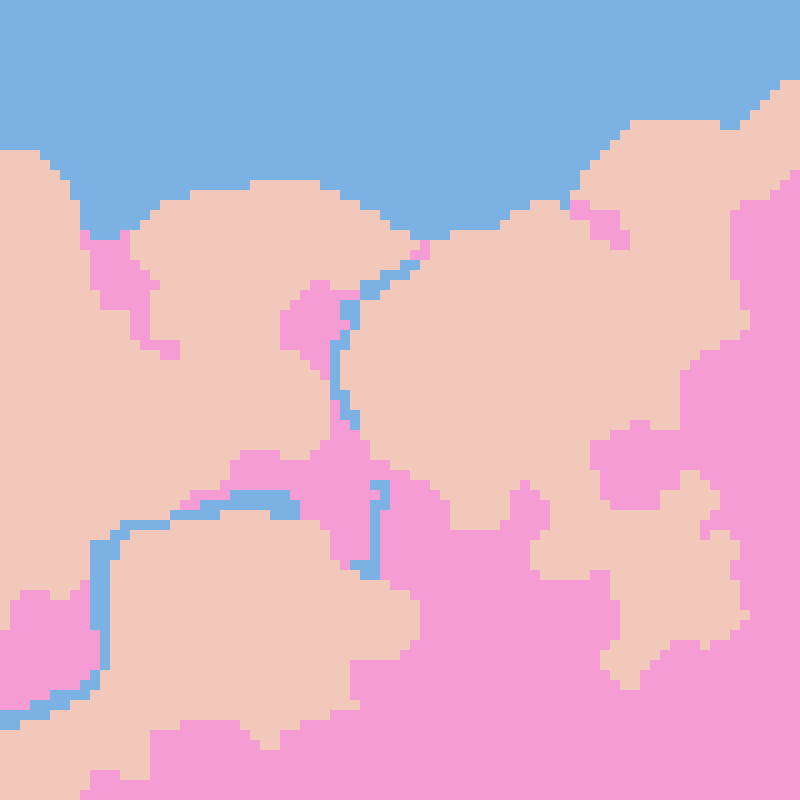
In this step, you can also update different parts of the drawing that you feel need fixing now that you’ve added the shadows.
The bottom of the clouds is mostly the shadow color. This is because I’ve chosen my light source to be on the top-left, so not much light enters the bottom right parts of the clouds.
When shading in general, I like to connect my shadows as much as I can because I feel it creates a sense of harmony and brings the drawing together. In the above drawing, the bottom right shadow is fully connected. There are no isolated shadow shapes. This is a personal preference, but I recommend not having too many shadow shapes, because it might start to get too noisy. Don’t let this discourage you from trying out different things, though!
One thing to remember is that there are two clouds because of the separation line, so they both need to be shaded as different clouds.
Now, you can stop here and move on to the next step, or add more shadow colors. Sometimes I just use one and move on, but in this case I want to add another shadow color.
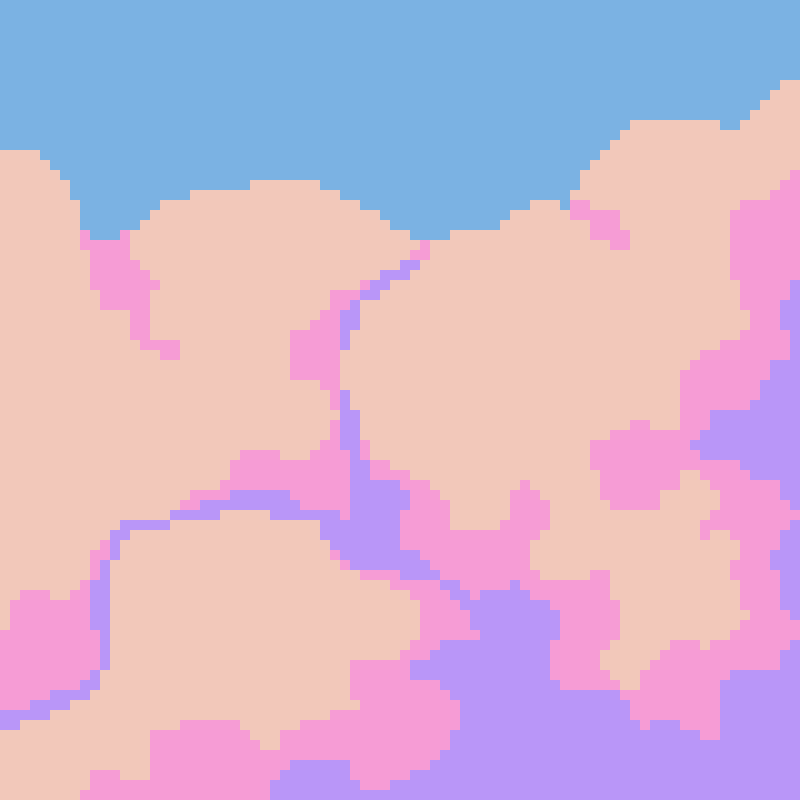
This one is a very different color than the others. The original base color is a peach color, the first shadow is pink, and this one is purple. I like having a lot of color variation in my drawings. If you want, you can try to sneak in some blue, or any other color you want here too, but in this case I’m just going to move on to adding highlights.
Step 4: Highlights
Highlights are the brightest part. The part where the sun reflects off of the clouds and into your eyes. Normally, drawing highlights would be pretty simple, by placing the highlights where the light shines, but for some reason I always struggle with drawing them on clouds. I use this weird approach instead, which makes it easier for me.
If this method doesn’t work for you, try placing the highlights in blobs close to the light source, but not all the way in the edge.
I’ve put the highlight color all over the drawing. You’ll see why soon.

Here, I use the base color to remove certain parts of the highlights, and end up with the completed highlights.
Step 5: Final touches
The final touches include anti aliasing, detailing the background, and anything else you want to add, remove, or change!
Here’s the final result.

Hope this helped you learn how to draw clouds. Always feel free to try your own methods, this is just what works best for my art style. Happy drawing!